Embedding certificate data into a fdesetup plist file
One of the mysteries of the fdesetup man page has been the Certificate key of the INPUT PROPERTY LIST example.
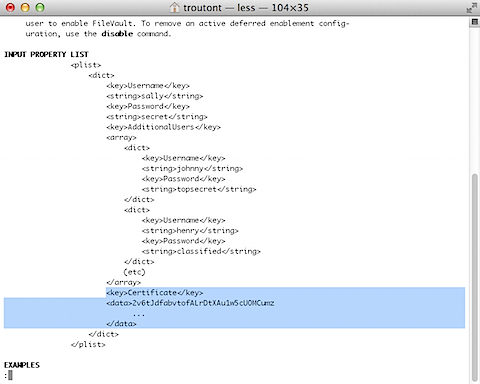
The function seemed clear enough; you could populate that key with the institutional recovery key’s public key. The problem was how to properly export the certificate into a text format and get it into that plist key. That part did not seem to be documented anywhere that I could find. After doing some asking around with our Apple SE, see below the jump for a way to get that certificate information into this plist key.
Prerequisites:
Your FileVault 2 public key exported as a .cer file.
Note: For a good description of how to export a FileVault 2 public key as a .cer certificate file, check the document at the link below:
The relevant section is named “To create an institutional recovery key and export it without the private key:”
Creating and exporting the certificate information
1. If not previously installed, install iPhone Configuration Utility onto your 10.8 Mac

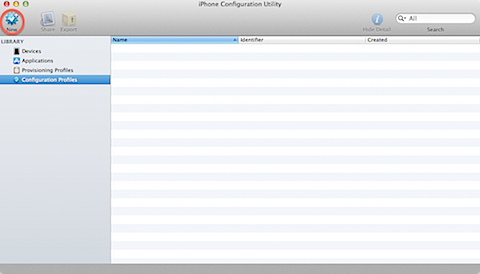
2. Open iPhone Configuration Utility
3. Select Configuration Profiles from the sidebar and then click the New button in the toolbar.
4. In the new configuration profile, select Credentials and click the Configure button.

5. Select your FileVault 2 public key .cer file

6. You should now see your FileVault 2 public key appear as a credential.

7. Export the configuration profile with Security set to None.

8. Save the filename.mobileconfig file to a convenient location.

Update: 8-22-2012 – Wade in the comments has pointed out that you can convert the certificate without iPhone Configuration Utility by using the base64 command. To do the conversion this way and export the results to a text file, run the following command:
base64 /path/to/certificate.cer > filename.txt
I’ve tested this method by encrypting a Mac using fdesetup and then by booting from Recovery HD to run a recovery from the command line. It works fine, so use whatever conversion method (IPCU or base64 in Terminal) works best for you.
Adding the certificate data to your fdesetup .plist file
1. Open the filename.mobileconfig file in a convenient text editor (I used TextWrangler for mine.)
2. Look for the PayloadCertificateFileName key, then select the certificate data stored in its associated PayloadContent key.

3. Strip the leading spaces from the certificate data.
4. Add it to your fdesetup .plist file

Now that the public key’s certificate data has been added to the plist file, you should now be able to set up your 10.8 and higher Macs with both the alphanumeric individual recovery key and the institutional recovery key without having to reference a separate certificate file. fdesetup will use the public key certificate data to build a FileVaultMaster.keychain in /Library/Keychains and correctly place the public key inside the keychain.
For example, the following command will enable FileVault 2 encryption, set up the designated user accounts in the plist and set up the Mac to use both an alphanumeric individual recovery key (which the individual Mac will generate) and build a FileVaultMaster.keychain in /Library/Keychains.
sudo fdesetup enable -inputplist < /path/to/filename.plist
The following command will enable FileVault 2 encryption, set up the designated user accounts in the plist and set up only the institutional recovery key by building a FileVaultMaster.keychain in /Library/Keychains.
sudo fdesetup enable -inputplist < /path/to/filename.plist -norecoverykey
Leave a comment
Recent Comments
| Ben LeRoy on Losing a giant | |
| Peter-Erik on Downloading installer packages… | |
| nathanhaggard on Losing a giant | |
| andras0602 on Disabling login window clock d… | |
| Jeff on Losing a giant |

FWIW you could just base64 encode the cert instead of using IPCU. You just need to open terminal and type “base64” then drag your cert into the window.
I’ll be danged. “base64 /path/to/certificate.cer” works as well, and is much simpler. I’ll add a note to the post.
Thank you for sharing this. You probably saved me hours of time.
If you are scripting things out:
cert_base16=$(xxd -p “/path/to/certificate.cer” | tr -d ‘\n’)
defaults write /path/to/plist.plist “Certificate” -data “$cert_base16”