Archive
Updated scripts for downloading packages from a JCDS2 distribution point
As part of an earlier post, I had provided scripts for downloading installer packages from a JCDS2 distribution point. I’ve made some updates to the scripts to provide more checking of the installer packages, to hopefully ensure that the downloaded installer package and the package available in the JCDS2 distribution point are exactly the same package.
The original scripts would check the download directory and see if there was an installer package with the same name as an installer package in the JCDS2 distribution point. If there was an installer package with a matching name, download of the installer package was skipped and the script would move on to the next installer package.
In the updated scripts, if there are installer packages already in the download directory which have the same name as an installer package in the JCDS distribution point, the MD5 hash of the existing installer package is checked against the MD5 hash of the installer package stored in the JCDS distribution point.
If the MD5 hashes match, download of the installer package with the matching name is skipped. If the MD5 hashes do not match, the existing installer package in the download directory is deleted and a fresh copy of the installer package is downloaded. For more details, please see below the jump.
Using the Jamf Pro API to download installer packages from a JCDS2 distribution point
As part of Jamf’s release of Jamf Cloud Distribution Service 2.0, Jamf has added the ability to communicate with a JCDS 2 distribution point via the Jamf Pro API:

Among these new API capabilities is the ability to query a JCDS 2 DP for download links, for the installer packages stored in the distribution point.
https://developer.jamf.com/jamf-pro/reference/get_v1-jcds-files-filename

I’m interested in this because I’ve had an existing workflow for downloading installer packages from a non-JCDS AWS-hosted cloud distribution point, where I’ve been using AWS’s awscli command line tool to run a one-way synchronization process between the cloud distribution point in Amazon’s S3 service and a local directory stored on a Mac.
For those who want to use this new capability, I’ve written a script which uses the Jamf Pro Classic API and Jamf Pro API to get the list of installer packages on a Jamf Pro server, retrieve the associated download links and download the installer packages to a directory on my Mac. For more details, please see below the jump.
Session videos from Jamf Nation User Conference 2023 now available
Jamf has posted the session videos for from Jamf Nation User Conference 2023, including the video for my “Installer Package Scripting: Making Your Deployments Easier, One #! at a Time” session.
For those interested, all of the the JNUC 2023 session videos are available on YouTube, though it doesn’t appear that there’s a dedicated YouTube playlist at this point.
Update – 2023-01-03: There is now a dedicated YouTube playlist available.
For convenience, I’ve linked my session here.
Enabling Touch ID authentication for sudo on macOS Sonoma
Since the release of macOS High Sierra, it has been possible to enable Touch ID authentication for the sudo tool. However, the necessary modifications needed to be re-applied after every update to macOS because the modified file would get overwritten with the OS’s default values each time macOS was updated.
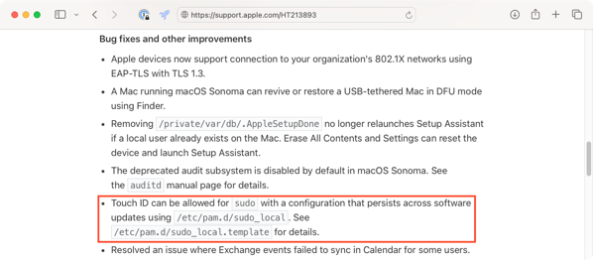
As of macOS Sonoma though, this modification can now be persistent. Apple included the following note as part of the the What’s new for enterprise in macOS Sonoma KBase article:
Touch ID can be allowed for sudo with a configuration that persists across software updates using /etc/pam.d/sudo_local. See /etc/pam.d/sudo_local.template for details.
When examined on macOS Sonoma 14.0.0, the contents of the /etc/pam.d/sudo_local.template file are as shown below:
This file contains bidirectional Unicode text that may be interpreted or compiled differently than what appears below. To review, open the file in an editor that reveals hidden Unicode characters.
Learn more about bidirectional Unicode characters
| # sudo_local: local config file which survives system update and is included for sudo | |
| # uncomment following line to enable Touch ID for sudo | |
| #auth sufficient pam_tid.so |
Copying the /etc/pam.d/sudo_local.template file to /etc/pam.d/sudo_local and uncommenting the indicated line allows Touch ID to work for authentication to the sudo tool.
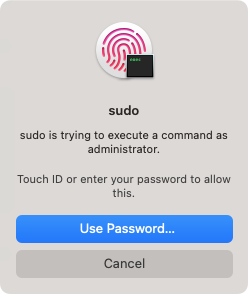
To assist with the process of enabling and disabling Touch ID authentication for the sudo tool, I’ve written a couple of scripts. For more details, please see below the jump.
Slides from the “Installer Package Scripting” session at Jamf Nation User Conference 2023
For those who wanted a copy of my installer package scripting talk at Jamf Nation User Conference 2023, here are links to the slides in PDF and Keynote format.
- PDF – https://tinyurl.com/JNUC2023PDF
- Keynote – https://tinyurl.com/JNUC2023Keynote
Updating management status in Jamf Pro computer inventory records on Jamf Pro 10.49.0 and later
As of Jamf Pro 10.49.0, the following mass action has been removed:
- Edit the Management Account Information
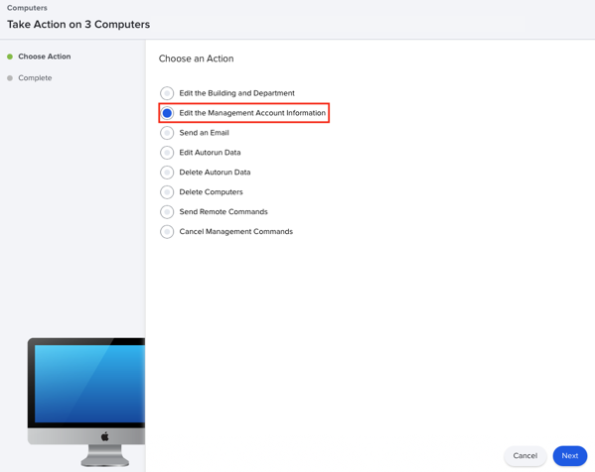
I had been using this to update the status of unmanaged Macs to now be managed Macs, by editing the username and password assigned to the computer inventory record. As part of this, the remote management status of the computer inventory record would change from Unmanaged to Managed.
As of Jamf Pro 10.49.0, the management account information has been removed from the computer inventory record, with the resulting removal of the mass-action to edit the management account information. However, this has left me without a mass-action to change unmanaged Macs to managed Macs.
Fortunately, there’s a way to change this via the Jamf Pro Classic API. The relevant API command to change the management status in a Jamf Pro computer inventory record should look like this:
This file contains bidirectional Unicode text that may be interpreted or compiled differently than what appears below. To review, open the file in an editor that reveals hidden Unicode characters.
Learn more about bidirectional Unicode characters
| /usr/bin/curl -H "content-type: text/xml" "https://jamf.pro.server.here/JSSResource/computers/id/jamf_pro_computer_ID_goes_here" –header "Authorization: Bearer api_token_goes_here" -X PUT -d "<computer><general><remote_management><managed>true</managed></remote_management></general></computer>" |
It’s sending the following XML block to update the relevant computer inventory record and make the management change:
This file contains bidirectional Unicode text that may be interpreted or compiled differently than what appears below. To review, open the file in an editor that reveals hidden Unicode characters.
Learn more about bidirectional Unicode characters
| <computer> | |
| <general> | |
| <remote_management> | |
| <managed>true</managed> | |
| </remote_management> | |
| </general> | |
| </computer> |
Previously, you also needed to send along the management username and management password, but since those have been removed as of Jamf Pro 10.49.0, those are no longer needed.
I have filed a feature request with Jamf to get back an equivalent mass-action to update the management status. For those interested, it is the following:
JN-I-27551: https://ideas.jamf.com/ideas/JN-I-27551
While I wait to see what Jamf does with the feature request, I was able to use the API information discussed above to create a script which a) updates the management status in specified computer inventory records and b) generates a report of the Macs whose computer inventory records were updated. For more details, please see below the jump.
Removing Oracle Java from macOS
As of January 23, 2023, Oracle made a change to how they’ve licensed Oracle’s Java (which is a separate license from the ones used for open source Java distributions like OpenJDK.) The new license terms are described here in Oracle’s FAQ, but to summarize the main difference between the old licensing and the current licensing is that Oracle introduced a new employee-based metric.
- Old license: License costs were based on how many employees your company has which used Oracle’s Java.
- Current license: License costs are based on how many employees your company has.
See the difference? Previously, if your company had 1000 employees and 2 used Oracle’s Java for purposes which required payment under the old license, the company paid for 2 licenses. Under the current license, if your company has 1000 employees and 2 use Oracle’s Java, Oracle may say that now the company needs to pay for 1000 licenses.
There’s more to it and I am not the person to turn to when needing explanation of complex legal and financial questions, but the operational consequence for Mac admins is that companies which had previously been OK with Oracle Java being installed on their Macs may now be coming to their Mac admins, asking how Oracle Java can be removed and kept off.
To assist with this, I’ve written a script which should remove Oracle Java JREs and JDKs on macOS. For more details, please see below the jump.
Listing and downloading available macOS installers using Apple’s softwareupdate tool
As of macOS Catalina and Big Sur, Apple added some useful functionality to the softwareupdate tool which allows you to list the macOS installers (starting on macOS Big Sur) available to a particular Mac and then to download them (starting on macOS Catalina.)
I’ve used both functions frequently when I needed to identify and download new macOS installers, so I decided to write a script which makes the task easier. For more details, please see below the jump.
Manually triggering MDM profile renewal with Jamf Pro
When you enroll a Mac with Jamf Pro, the first profile the Mac receives is named MDM Profile.
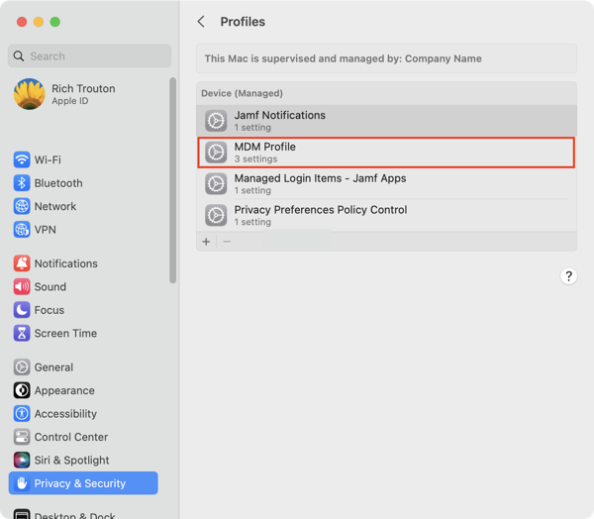
It is valid for two years.
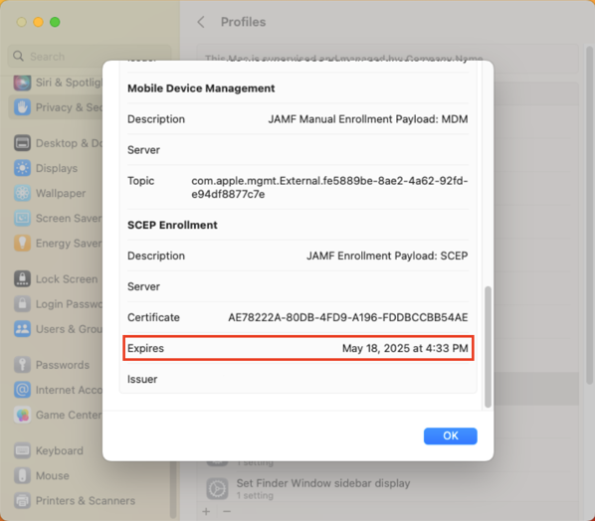
After two years, the MDM profile is supposed to automatically renew but sometimes this renewal process is either not triggered or is triggered and does not succeed.
On Jamf Pro, there’s a couple of ways you can manually trigger the MDM renewal to occur. The first is a manual process which uses the Jamf Pro admin console. The second uses both of Jamf Pro’s APIs and can be automated via a Jamf Pro policy. For more details, please see below the jump.
Using Script2Pkg to create payload-free installer packages
Payload-free packages are something I’ve discussed from time to time, as I’ve found them to be very useful additions to my Mac admin toolkit. For those not familiar with the concept, payload-free installer packages are installer packages that exist only to run scripts. They don’t install any files, which would be referred to as the installer package’s payload. With no payload included with these installer packages, the installer packages built by this tool are referred to as payload-free.
A while back, I wrote a tool that would let me easily create them from existing scripts named Payload-Free Package Creator.app. The general idea was that you could use this tool to select a script, and then Payload-Free Package Creator.app would create an unsigned payload-free installer package which would run the selected script.
I’m happy to say that my team at work has expanded on that idea and has both built and open-sourced a tool for building payload-free packages named Script2Pkg. Script2Pkg includes the following functions:
- Building an unsigned payload-free installer package
- Building a signed payload-free installer package
- Building a signed and notarized payload-free installer package
- Verifying signing and notarization status of any installer package
For more details, please see below the jump.
Recent Comments