Archive
Disabling login window clock display on macOS Sonoma
One of the changes with macOS Sonoma is to the login window, where the username blanks and icons were made smaller and moved down to the bottom of the screen and a large clock display is enabled by default near the top of the login window.

For folks who don’t want the clock display, it’s possible to turn it off via System Settings. In the Lock Screen settings, set the Show large clock option to one of the following settings:
- On Screen Saver and Lock Screen
- On Lock Screen
- Never

The Never setting will stop from being displayed on either the login window or as part of the screen saver.

For more information, please see below the jump.
Blocking Jamf Pro’s macOS Onboarding feature using a macOS configuration profile
One of the new features of Jamf Pro 11.1.x and later is macOS Onboarding, which is a Self Service-based feature which provides a way to run a setup policy or policies. Rob Potvin has a good write-up on it here, which I recommend checking out:
https://www.motionbug.com/jamf-pro-and-macos-onboarding/
One of the things to be aware of with the new macOS Onboarding feature is that once the feature has been enabled, macOS Onboarding will run its associated policies on all Macs which don’t have the following user-level preference set:
- Domain: com.jamfsoftware.selfservice.mac
- Key: com.jamfsoftware.selfservice.onboardingcomplete
- Value: Boolean (TRUE or FALSE)
Value set to FALSE (allowing macOS Onboarding to run):
This file contains bidirectional Unicode text that may be interpreted or compiled differently than what appears below. To review, open the file in an editor that reveals hidden Unicode characters.
Learn more about bidirectional Unicode characters
| <?xml version="1.0" encoding="UTF-8"?> | |
| <!DOCTYPE plist PUBLIC "-//Apple//DTD PLIST 1.0//EN" "http://www.apple.com/DTDs/PropertyList-1.0.dtd"> | |
| <plist version="1.0"> | |
| <dict> | |
| <key>com.jamfsoftware.selfservice.onboardingcomplete</key> | |
| <false/> | |
| </dict> | |
| </plist> |
Value set to TRUE (blocking macOS Onboarding from running):
This file contains bidirectional Unicode text that may be interpreted or compiled differently than what appears below. To review, open the file in an editor that reveals hidden Unicode characters.
Learn more about bidirectional Unicode characters
| <?xml version="1.0" encoding="UTF-8"?> | |
| <!DOCTYPE plist PUBLIC "-//Apple//DTD PLIST 1.0//EN" "http://www.apple.com/DTDs/PropertyList-1.0.dtd"> | |
| <plist version="1.0"> | |
| <dict> | |
| <key>com.jamfsoftware.selfservice.onboardingcomplete</key> | |
| <true/> | |
| </dict> | |
| </plist> |
Fortunately, it’s possible to add this setting with a value of TRUE to a macOS configuration profile and deploy the profile to all Macs that you don’t want to run macOS Onboarding on.
For those who would need this, I have an example macOS configuration profile with com.jamfsoftware.selfservice.onboardingcomplete set to TRUE available via the link below:
https://github.com/rtrouton/profiles/tree/main/JamfProSelfServiceOnboardingCompleted
Suppressing undesired local account password policy notifications on macOS Sonoma
As part of the release of macOS Sonoma 14.0.0, there is a bug which may be triggered if you have deployed a configuration profile which sets password rules for local accounts. An example profile is shown below:
This file contains bidirectional Unicode text that may be interpreted or compiled differently than what appears below. To review, open the file in an editor that reveals hidden Unicode characters.
Learn more about bidirectional Unicode characters
| <?xml version="1.0" encoding="UTF-8"?> | |
| <!DOCTYPE plist PUBLIC "-//Apple//DTD PLIST 1.0//EN" "http://www.apple.com/DTDs/PropertyList-1.0.dtd"> | |
| <plist version="1.0"> | |
| <dict> | |
| <key>PayloadContent</key> | |
| <array> | |
| <dict> | |
| <key>PayloadDisplayName</key> | |
| <string>Passcode</string> | |
| <key>PayloadIdentifier</key> | |
| <string>com.apple.mobiledevice.passwordpolicy.3BCA8E01-3CB9-4D6B-8338-518C51B80AAF</string> | |
| <key>PayloadType</key> | |
| <string>com.apple.mobiledevice.passwordpolicy</string> | |
| <key>PayloadUUID</key> | |
| <string>F0B7EB5D-5DF1-4DDC-8A80-01CA458E6157</string> | |
| <key>PayloadVersion</key> | |
| <integer>1</integer> | |
| <key>allowSimple</key> | |
| <false/> | |
| <key>forcePIN</key> | |
| <true/> | |
| <key>maxFailedAttempts</key> | |
| <integer>10</integer> | |
| <key>minLength</key> | |
| <integer>15</integer> | |
| <key>minutesUntilFailedLoginReset</key> | |
| <integer>15</integer> | |
| <key>requireAlphanumeric</key> | |
| <true/> | |
| </dict> | |
| </array> | |
| <key>PayloadDescription</key> | |
| <string>Sets password rules for local accounts on this Mac.</string> | |
| <key>PayloadDisplayName</key> | |
| <string>Local Account Password Rules</string> | |
| <key>PayloadIdentifier</key> | |
| <string>com.company.9EF1E03A-5DEB-4D1F-9E14-D76AFF153C35</string> | |
| <key>PayloadOrganization</key> | |
| <string>Company Name</string> | |
| <key>PayloadType</key> | |
| <string>Configuration</string> | |
| <key>PayloadUUID</key> | |
| <string>40829036-5EAF-42C9-9678-D27F0C28654B</string> | |
| <key>PayloadVersion</key> | |
| <integer>1</integer> | |
| </dict> | |
| </plist> |
In those cases, you may see one or the other following notifications when you log into macOS Sonoma for the first time.


These notifications don’t actually indicate a problem and clicking on them does nothing but make the messages disappear. However, for shops which are using profiles which set local account password rules, these messages will almost certainly cause tickets asking “What is this and what does it mean?” from your user community.
I have filed feedback with Apple regarding this issue. For those wishing to reference it, it is Feedback # FB12845634.
For the initial release of Sonoma, the best solution identified so far is to suppress the notifications for local password management, to make sure that these notifications don’t appear until Apple releases an update to macOS Sonoma which addresses this problem. To assist with this, I have an example profile available from the link below:
https://github.com/rtrouton/profiles/tree/main/DisableAppleLocalUserAccountPasswordNotifications
Note: The example profile linked above will suppress all local account password policy notifications. If you are using local account password policy notifications for other purposes, this solution may not work for you.
The component in macOS which generates the local account password notifications also exists on macOS Ventura, so you should be able to deploy a profile like the one linked above to macOS Ventura. This should ensure that Macs upgrading to macOS Sonoma also have these notifications suppressed from the start on macOS Sonoma 14.0.0.
Blocking Oracle Java
As a follow-up to my previous post on removing Oracle Java, it’s possible that Mac admins may be requested to block Oracle Java in place of removing it. This may be challenging, but possible with the right information and tools. For more details, please see below the jump.
Setting user-level global preferences in a macOS configuration profile
When managing user settings with a profile, you often need to define what the preference domain is in order to specify which settings to manage. Usually you can check the CFBundleIdentifier of an application to get the unique identifier used to define the preference domain.
Normally, these unique IDs (and corresponding preference domains) use a reverse-DNS-lookup scheme. For example, the preference domain for Apple’s web browser Safari is the following:
com.apple.Safari
This is derived from:
a. Apple using the following domain name:
b. The application in question being named Safari.
Note: This is a convention, rather than a hard and fast requirement, but most applications’ unique identifiers and corresponding preference domains will use this naming convention.
However, there’s an exception to be aware of. macOS uses a special domain to identify settings which should apply to all applications started by the same user. This preference domain is called the NSGlobalDomain, but unlike most preference domains, you don’t use NSGlobalDomain to define the preference domain when trying to manage their settings with a profile. This can cause some confusion when trying to manage these settings. The preference domain in this case is the following:
.GlobalPreferences
For more details, please see below the jump.
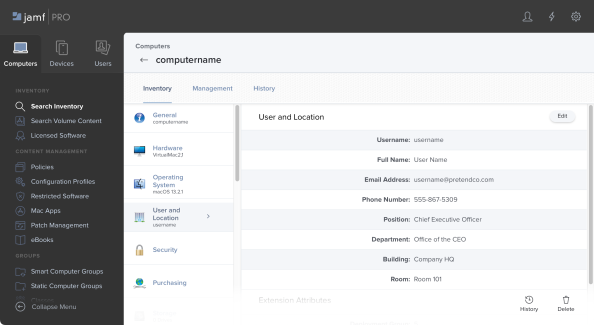
Providing Jamf Pro computer inventory information via macOS configuration profile
Jamf Pro can store and make available a lot of information about a particular computer and who is using it as part of the computer’s inventory record, but it can be challenging to access that information from the computer itself.
It is possible to use an API call to access this information, using either the Jamf Pro API or Jamf Pro’s Classic API, but that means providing a way to authenticate to the API. This may pose some security issues as you will need to both:
- Provide a way for the computer to access those authentication credentials
- Protect the authentication credentials from potentially malicious third parties
Fortunately, there is an alternative way to provide at least some inventory information without needing to make an API call. Jamf Pro provides a number of variables which can be used in macOS configuration profiles and it’s possible to leverage those variables to build a profile whose task is providing information from the computer’s inventory record in Jamf Pro in a way which can be accessed from the managed computer. For more details, please see below the jump.
Specifying shell commands to run when opening new Terminal windows from macOS’s Terminal settings
As a follow-up to a previous post, as part of that post I had been running certain shell commands by adding them to a .zshrc file:
- export PS1=”\$ “: Sets the prompt to only display “$” (no quotes) using the PS1 environmental variable.
- unset zle_bracketed_paste: Disable the zsh shell’s bracketed paste feature.
With some additional research, I learned that I could also run these commands using the Run command function which is available in your Terminal settings under the Shell tab.

To replicate what I wanted, I had to enable the Run command option in the Shell tab, then also set Run inside shell. Once those were enabled, I added the following shell commands:
export PS1="\$ " && unset zle_bracketed_paste && clear
- export PS1=”\$ “: Sets the prompt to only display “$” (no quotes) using the PS1 environmental variable.
- unset zle_bracketed_paste: Disable the zsh shell’s bracketed paste feature.
- clear: Removes all contents (including running the commands listed above) from the Terminal window.
The reason why this is nice is that I can now add running these commands to a macOS configuration profile using the CommandString key:
This file contains bidirectional Unicode text that may be interpreted or compiled differently than what appears below. To review, open the file in an editor that reveals hidden Unicode characters.
Learn more about bidirectional Unicode characters
| <key>CommandString</key> | |
| <string>export PS1="\$ " && unset zle_bracketed_paste && clear</string> |
To see this used in context in a macOS configuration profile, please see below the jump.
Customizing Terminal behavior for documentation needs
As part of writing documentation today, I was given a script to follow when making some videos as part of the documentation process. The script included the following requirement:
- Prepare the Terminal to not show the hostname or the logged-in user
By default, Terminal in macOS Monterey will show both. How to get rid of this?

Fortunately for me, @scriptingosx had already documented how to do this as part of this post. You can use the PS1 environmental variable to set how your prompt appears in Terminal. After some experimentation, I set the following environmental variable:
PS1="\$ "
To have this prompt appear whenever I opened a new Terminal session, I added the following line to a newly-created .zshrc file in my home folder:
export PS1="\$ "
The .zshrc file is a configuration file for the zsh shell, so adding that and then opening a new Terminal window gave me a prompt which looks like this.

As part of making the videos, I also noticed that when I copied and pasted a command into the Terminal that the pasted text was highlighted automatically. I’d seen this before and ignored it, but I thought it might be an unnecessary distraction for those watching this video later, so I went looking for how to disable it.

After some research, I found that this was zsh’s “bracketed paste” feature, which was introduced as part of zsh 5.1. This feature can be turned off using the following command:
unset zle_bracketed_paste

Adding entries for both the prompt and turning off bracketed paste to my .zshrc file gave me the Terminal behavior I wanted:
export PS1="\$ "
unset zle_bracketed_paste

I also performed additional customization of my Terminal experience, but those modifications were managed using a configuration profile. For more details on that, please see this previous post:
Enabling full disk access for SSH on macOS Big Sur using a management profile
When connecting via SSH to a remote Mac running macOS Big Sur, Apple’s user-level privacy controls apply. You can access data in the home folder of the account you’re using to connect, but you can’t access or alter protected data in other account’s home folders.
For most use cases, this is fine. However, there may be circumstances when full disk access for SSH connections is desired. To accommodate for this, Apple added an Allow full disk access for remote users checkbox in the Remote Login settings in System Preference’s Sharing preference pane.

This setting can normally only be enabled by the logged-in user sitting at that Mac. However, there is a way to manage this with a configuration profile. For more details, please see below the jump.
Enabling diagnostic logging for Microsoft Outlook 2019
I was recently asked for assistance with a way to enable diagnostic logging for Microsoft Outlook 2019 for macOS:
I had seen Microsoft’s KBase article on how to do it, where it references enabling logging via the Outlook preferences:
https://support.microsoft.com/en-us/help/2872257/how-to-enable-logging-in-outlook-for-mac
However, the KBase article only references how to enable this logging via the GUI and does not show how to do this via the command line. Fortunately my colleague @golby knew which settings could enabled from the command line to produce the requested logging. For more details, please see below the jump:

Recent Comments