Managing ESXi-hosted virtual machines using VMware Fusion Professional
When VMware released VMware Fusion 7 Professional in September 2014, among the new items included in the Features list was this one:
The ability to access virtual machines running on VMware vSphere, VMware ESXi, and VMware Workstation directly from VMware Fusion Pro including:
- Remote display, keyboard, and mouse control
- Ability to select media for CD, DVD, floppy devices, including files on your Mac
- Ability to power virtual machines on and off and configure the network they connect to
- Ability to move virtual machines from your Mac to a remote location by dragging and dropping
- Ability to move virtual machines from a remote location to your Mac by dragging and dropping
- See the state of your remote server with at-a-glance health summary based on Activity Monitor
What this new feature meant for Mac admins was that they now had a native Mac application which they could use when managing virtual machines (VMs) on VMware’s ESXi or vSphere services. The capabilities are not as full-featured as you may find in the Windows VMware vSphere client or the vSphere web client, but they are equivalent to the ESXi or vSphere management capabilities that VMware has been building into VMware Workstation for Windows. For more details, see below the jump.
Accessing ESXi servers using VMware Fusion Professional
To get started, you can use the following procedure to connect to an ESXi server from VMware Fusion Professional:
1. Launch VMware Fusion 7 Professional.
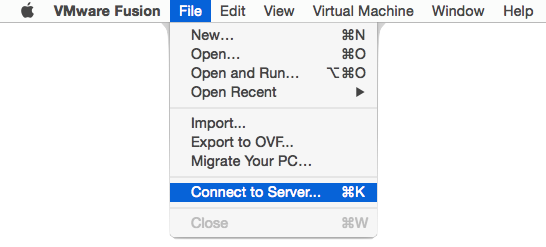
2. Under the File menu, select Connect to Server…
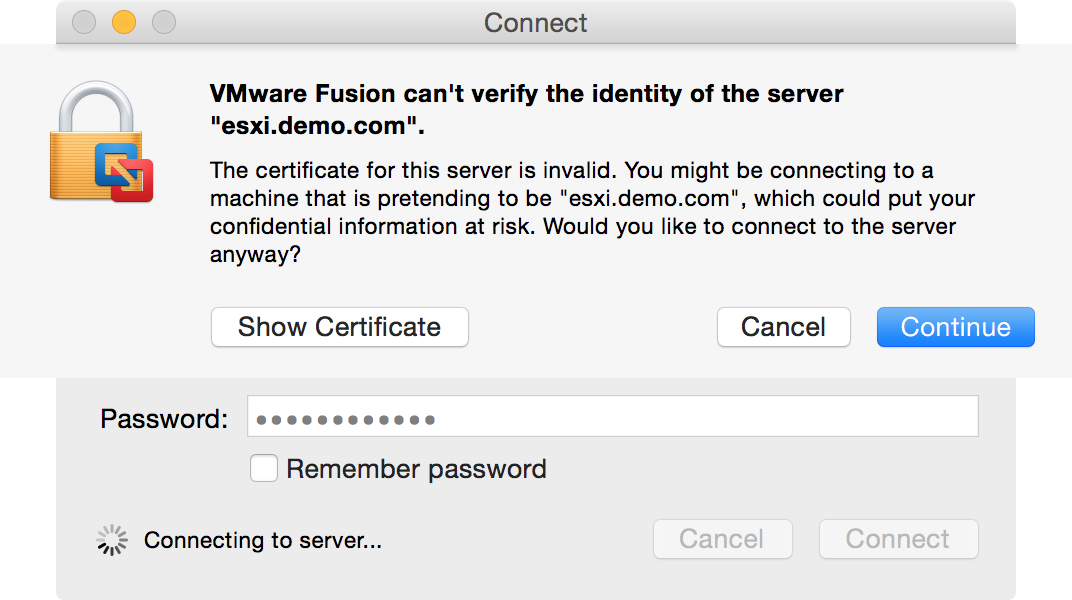
3. Enter the server address, username and password as appropriate.

4. If your ESXi server is using a self-signed certificate, you’ll be warned about it.
5. Next, you should see a new section appear under the Virtual Machines list with the name of your ESXi server.
Once you’re connected, if you click on the name of your ESXi server, you’ll be given information on the status of your ESXi server.

Clicking on the individual VMs will give you the ability to access the VM’s settings, as well as power on, power off, restart, suspend and make snapshots.
One important thing to know is that the VMware Tools need to be installed in the VMs in order to get full management functionality. For example, if the VMware Tools are not installed in a particular VM, the function to power off that VM will not be available in the ESXi management options in VMware Fusion Professional.

To remotely administer an ESXi-hosted VM, double-click on one of the listed VMs. A console window should open up and give you direct access to the VM.

Exporting virtual machines between VMware Fusion and ESXi
As mentioned previously, one of the new capabilities in VMware Fusion 7 Professional is the ability to move virtual machines to and from your ESXi server. To upload a VMware Fusion-built VM to your ESXi server, use the following procedure:
1. Launch VMware Fusion 7 Professional if needed.
2. Verify that the VM that you want to copy to your ESXi server is shut down.
3. Connect to your ESXi server if needed.
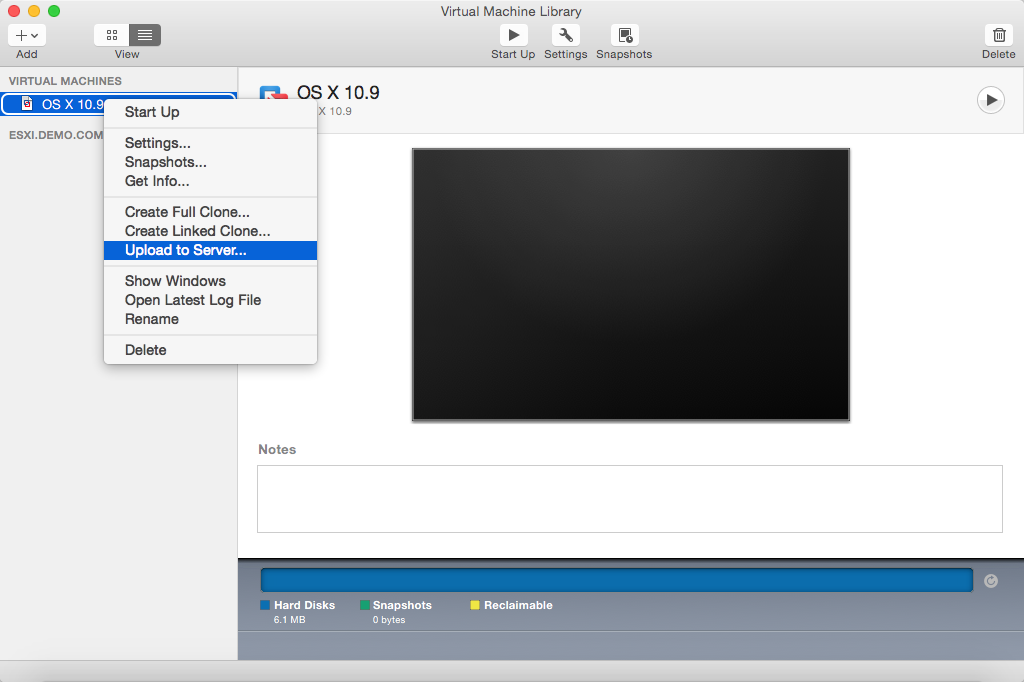
4. Right-click on the shutdown VM and select Upload to Server…
5. If prompted, select your destination server and click the Continue button.

6. A new Upload Virtual Machine window will appear.
7. Select the ESXi datastore that you want to upload your Fusion-built VM into and click the Upload button.

8. The selected VM will upload to the ESXi server.

9. Once uploaded, the VM will appear in the list of your ESXi VMs as a shutdown VM.

Once uploaded, the selected VM can access media stored either locally on your Mac or on the ESXi server. As an example, here’s how to attach an ISO disc image file stored on your ESXi server to an ESXi-hosted VM.
1. Launch VMware Fusion 7 Professional if needed.
2. Connect to your ESXi server if needed.
3. Open your VM’s settings
4. Select CD/DVD from your VM settings

5. Select Choose a remote disc image… from the drop-down menu in the CD/DVD settings.

6. Select the datastore on your ESXi server where the desired ISO disc image is stored.
7. Once the desired ISO disc image file is found, select it and click the Open button.

8. Verify that the desired ISO disc image is selected and that the VM is configured to use it.
9. Check the Connect At Power On checkbox. This step is very important, or the ISO disc image will not mount or otherwise be available to the VM.

To download an ESXi-hosted VM into VMware Fusion, use the following procedure:
1. Launch VMware Fusion 7 Professional if needed.
2. Connect to your ESXi server if needed.
3. Shut down the ESXi-hosted VM that you want to copy to VMware Fusion on your Mac.
4. Right-click on the desired VM and select Download from Server…

5. Select where you want to save the downloaded VM and click the Save button.

6. The selected VM will be downloaded to your Mac.

7. Once downloaded, the VM will be added to your list of virtual machines in VMware Fusion Professional.

There are three issues to be aware of when uploading or downloading VMs between VMware Fusion and ESXi 5.5:
- ESXi 5.5 supports up to VMware’s Hardware Version 10 for hosting virtual machines.
- VMware Fusion 7 Pro will build VMs by default using VMware’s Hardware Version 11.
- For OS X VMs: Upload and download processes involving ESXi will not transfer the necessary smc.present = “TRUE” attribute for an OS X VM’s .vmx configuration file.
The smc.present = “TRUE” attribute allows a VM with OS X as the guest OS to check and detect that it’s running on Apple hardware. Without this check succeeding, the VM cannot verify it’s running on non-Apple hardware. Unless that check succeeds, OS X VMs will not complete startup successfully and will appear to hang.
Linux and Windows VMs do not need the smc.present = “TRUE” attribute, so those VMs running those OSs are unaffected by this issue.
Note: Uploading an OS X VM to an ESXi server assumes the ESXi server in question is running on Apple hardware. VMware does not support running OS X VMs on non-Apple hardware.
It is possible to address the VMware Hardware Version issue in VMware Fusion before uploading VMs to an ESXi 5.5. server. To enable Fusion 7-built VMs to use Hardware Version 10, use the following procedure:
Update: 4-6-2015 – If you are running ESXi 6.x, both VMware Fusion 7.x and ESXi 6.x support VMware’s Hardware Version 11. Downgrading to Hardware Version 10 will not be necessary if transferring to an ESXi 6.x server.
1. Launch VMware Fusion 7 Professional if needed.
2. Verify that the virtual machine you want to edit is completely shut down. In this example, I’m using an OS X VM.
3. Open the VM settings and go into the USB & Bluetooth settings.

4. In the USB & Bluetooth settings, set it to use USB 2.0 instead of USB 3.0. USB 3.0 support is a new feature with VMware’s Hardware Version 11 and not supported on Hardware Version 10.

5. Go back out to the VM settings, then select Camera.

6. In the Camera settings, click the Remove Camera button.

7. When prompted, confirm that you want to remove the camera by clicking the Remove button. The camera is a new feature with VMware’s Hardware Version 11 and not supported on Hardware Version 10.

8. Go back out to the VM settings, then select Compatibility.

9. Change the Use Hardware Version: setting to 10

10. Once you’ve verified that the VM is set to use Hardware Version 10, click the Apply button.

At this point, your OS X VM should be set to use VMware’s Hardware Version 10, which will allow it to be uploaded to an ESXi 5.5 server.
If the VM in question is an OS X VM, you will need to edit the uploaded VM’s .vmx configuration file to add the smc.present = “TRUE” attribute attribute back to the VM’s .vmx configuration file before the VM will be able to boot. There’s a few ways to do this, but I have used the open-source Cyberduck FTP / SFTP applications’s ability to edit remote files in order to do this.
Here’s the procedure I have used to edit an uploaded OS X VM’s .vmx configuration file using Cyberduck. In this case, I have set the TextWrangler text editing application in Cyberduck’s preferences as my preferred editor:
1. Verify that my ESXi server is running on Apple hardware
2. Verify that the uploaded OS X VM is shut down on the ESXi server.
3. Verify that SSH is enabled on the ESXi server.
4. Connect to the ESXi server with Cyberduck via SFTP
5. Navigate to /vmfs/volumes/datastore_name_here/uploaded_vm_name_here/
6. Select /vmfs/volumes/datastore_name_here/uploaded_vm_name_here/uploaded_vm_name_here.vmx and click the Edit button in the Cyberduck browser window.

7. At the bottom of the uploaded_vm_name_here.vmx file, add the following entry:
smc.present = "TRUE"

8. Save the changes in TextWrangler. That save process will then enable Cyberduck to write the changes back to the uploaded_vm_name_here.vmx configuration file on the ESXi server.
9. Disconnect and then quit Cyberduck.
Once the VM has been uploaded and the VM’s uploaded_vm_name_here.vmx configuration file has been edited, your ESXi-hosted OS X VM can now be started and will boot normally.
If you have downloaded an OS X VM from an ESXi server to VMware Fusion Professional, you will also need to edit the downloaded VM’s .vmx configuration file to add the smc.present = “TRUE” attribute back to the VM’s .vmx configuration file before the VM will be able to boot.
Here’s how you can add the smc.present = “TRUE” attribute using the editing tools available with VMware Fusion Professional.
1. Launch VMware Fusion 7 Professional if needed.
2. Verify that the virtual machine you want to edit is completely shut down.
3. Select the VM you want to edit.
5. Hold down the Option key on your keyboard and right-click the virtual machine.
6. Select Open Config File in Editor in the menu that appears. This will open up the VM’s .vmx configuration file for editing.

7. At the bottom of the VM’s .vmx configuration file, add the following entry:
smc.present = "TRUE"

8. Once your edits are finished, go up to the File menu and select Save to save your changes.
As a Mac admin who leverages virtualization, I have found that VMware’s addition of these new ESXi management features to Fusion Professional has made managing ESXi much easier. Being able to manage ESXi servers that are using either VMware’s free ESXi license, or a paid vSphere license with a native application, eliminated a considerable amount of overhead for me with regards to ESXi management.
Where previously I would have to devote time and resources towards having a Windows PC or VM available to manage a free ESXi server, I can now open VMware Fusion Professional and be able to manage my ESXi servers using the same tool that I’m already using to run my virtual machines on my Mac. That has made ESXi management an easier and more seamless experience for me. Hopefully, it will do the same for you.
Additional links
VMWare Fusion documentation center
VMware Fusion – Upload a Virtual Machine to a Remote Server
VMware Fusion – Download a Virtual Machine from a Remote Server
VMware Fusion – View the Status of a Server or Remote Virtual Machine
VMware Fusion – Enable a CD/DVD Drive on a Remote Virtual Machine
VMware Fusion – Enable a Floppy Drive on a Remote Virtual Machine
Leave a comment
Recent Comments
| Ben LeRoy on Losing a giant | |
| Peter-Erik on Downloading installer packages… | |
| nathanhaggard on Losing a giant | |
| andras0602 on Disabling login window clock d… | |
| Jeff on Losing a giant |

Really enjoying this series of articles. I’m dipping my toes in to ESXi virtualisation and your articles are really helpful.
Regarding the first part of the article. Is it possible to manage guest isolation settings with Fusion. I have a test machine setup but we are having issues dragging and dropping files between the ESXi hosted VM and the Mac desktop. Some goes for copy and paste.
So I did some digging around my test system and it doesn’t seem possible. I guess I either need to look at Workstation or if it is possible to edit the guest OS configuration files directly.
Reblogged this on Myles Gray.
Why can’t I add an existing virtual machine management to an availabliity set? I created a new Availability Set on one of my existing VM’s, and when I try to add another existing VM to the same Availability Set, it is not available. I am apparently missing some sort of pre-req to have them in the same set.
Thanks a lot! 😀 its helping me a lot and now i can use my Mac to administasion my home server width ESXi thanks a lot! 🙂
Thanks for this useful post, Rich. In Fusion Pro 7, I just created a new virtual OS X Yosemite on my MBA and uploaded it to ESXi 6 on my Mac Mini 2012. The VM boots, but hangs after a while – start progress bar stops at about 45%. On ESXi, the following is logged:
2015-09-16T19:20:31.535Z| vmx| I120: GuestRpcSendTimedOut: message to toolbox-dnd timed out.
I get the same error when creating a new VM on ESXi using an OS X Yosemite ISO on the ESXi server.
I was unable to find any solution to this online, any hint from your side?